Have you ever experienced the frustration of your favorite non-stick pan losing its glide, turning eggs into a sticky mess and making cleanup a chore? It’s a common culinary dilemma, but one with a surprisingly simple solution: proper seasoning and consistent care. While many believe non-stick pans are maintenance-free, a little attention can dramatically extend their life and keep them performing like new. This guide will reveal the secrets to seasoning your non-stick cookware, ensuring it remains your go-to for effortless cooking and easy cleaning for years to come.
What is Non-Stick Pan Seasoning and Why Does it Matter?
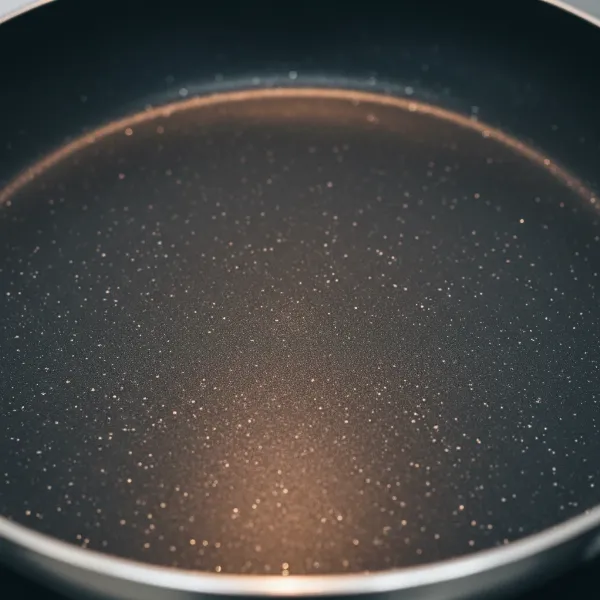
Seasoning a non-stick pan involves creating or reinforcing a thin, protective layer of oil on its cooking surface. Unlike cast iron, where seasoning builds a thick, polymerized layer, the goal for non-stick is to fill microscopic pores and smooth out minor imperfections in the existing coating. This process enhances the pan’s natural slipperiness, making it even more effective at releasing food with minimal oil. By regularly seasoning, you’re not just improving performance; you’re actively safeguarding the non-stick coating, thereby extending the pan’s overall lifespan and ensuring consistently excellent cooking results.
When Should You Season Your Non-Stick Cookware?
The ideal times to season your non-stick pan are crucial for its longevity and performance. Firstly, it’s highly recommended to season a brand-new non-stick pan. This initial seasoning helps to remove any factory residues and sets a foundational protective layer before its first use. Secondly, you should re-season your pan whenever you notice its non-stick properties beginning to diminish, or food starts to stick more frequently. While there isn’t a hard-and-fast rule for how often to season, some manufacturers suggest a refresh every month or every six months, depending on usage. If you have older non-stick pans that have never been seasoned, it’s not too late to start the process to revive their performance.
Step-by-Step Guide: How to Season Your Non-Stick Pan
Proper seasoning begins with careful preparation and the right technique. Follow these steps to ensure your non-stick pan gets the best possible treatment.
Preparation is Key
Before applying any oil, a thorough cleaning is essential to remove food residues and ensure the seasoning adheres effectively.
- Initial Cleaning: Wash your non-stick pan with warm water and a small amount of gentle dish soap, using a soft sponge or cloth. Avoid abrasive scrubbers like steel wool, which can damage the delicate non-stick surface. Rinse thoroughly.
- Tackling Stubborn Spots: For any persistent stuck-on food, fill the pan with water and add about ½ cup of white vinegar. Bring this mixture to a boil for about 10 minutes, then discard and proceed with regular washing.
- Complete Drying: Ensure the pan is absolutely dry before moving on. Moisture can prevent the oil from properly coating the surface. Use a soft towel to wipe it completely dry.
|
Our Picks for the Best Non stick pan in 2026
As an Amazon Associate I earn from qualifying purchases.
|
||
| Num | Product | Action |
|---|---|---|
| 1 | Non Stick Frying Pans, 12-inch with Lid, Hybrid Fajita Pans Nonstick,non stick Skillets Stainless Steel, Dishwasher & Oven-Safe, Induction Compatible Cooking Pan, PFOA Free Cookware |

|
| 2 | SENSARTE Nonstick Frying Pan Skillet with Lid, 12 Inch Large Deep Frying Pan, 5 Qt Non Stick Saute Pan with Cover, Induction Pan, Healthy Non Toxic Cooking Pan with Helper Handle, PFOA PFOS Free |
|
| 3 | Tramontina Professional 8-Inch Non Stick Small Frying Pan, Heavy-Gauge Aluminum Skillet with Reinforced Nonstick Coating, Red Handle, Dishwasher and Oven Safe |
|
| 4 | Blue Diamond 10" Nonstick Frying Pan Skillet, Diamond Infused PFAS & PTFE-Free Ceramic Pot, Dishwasher & Oven Safe, Stay Cool Handle, Durable Non Toxic Metal Utensil Safe, Egg & Omelet Pan, Blue |
|
| 5 | SENSARTE Nonstick Frying Pan Skillet, Swiss Granite Coating Omelette Pan, Healthy Stone Cookware Chef's Pan, PFOA Free (9.5 Inch) |
|
| 6 | SENSARTE Nonstick Frying Pan Skillet, Swiss Granite Coating Omelette Pan, Healthy Stone Cookware Chef's Pan, PFOA Free (8/9.5/10/11/12.5 Inch) (8 Inch) |
|
| 7 | GoodCook Nonstick Sauté Pan, 10 Inch, Black |
|
| 8 | CAROTE Nonstick Frying Pan Skillet,Non Stick Granite Fry Pan Egg Pan Omelet Pans, Stone Cookware Chef's Pan, PFOA Free,Induction Compatible(Classic Granite, 8-Inch) |
|
| 9 | Tramontina Professional 10-Inch Non Stick Frying Pan, Heavy-Gauge Aluminum Skillet with Reinforced Nonstick Coating, Red Handle, Dishwasher and Oven Safe |
|
| 10 | SENSARTE Nonstick Skillet, Deep Frying Pan 10/11/12-inch, Saute Pan with Lid, Stay-cool Handle, Healthy Stone Cookware Cooking Pan, Induction Compatible (10-Inch/3.5QT) |
|
Choosing the Right Oil
The type of oil you use for seasoning matters significantly.
- Recommended Oils: Opt for neutral cooking oils with a medium smoke point, such as vegetable oil, canola oil, or coconut oil. These oils form an effective protective layer without leaving a strong flavor or residue.
- Oils to Avoid: Steer clear of cooking sprays that contain lecithin or other emulsifying agents. These can build up on the non-stick surface over time, creating a sticky residue that degrades performance.
Stovetop Seasoning Method
This is a quick and effective method for most non-stick pans.
- Heat the Pan: Place the clean, dry pan on your stovetop over medium heat for approximately 1 to 3 minutes.
- Apply Oil: Remove the pan from the heat. Add 1 to 2 tablespoons of your chosen neutral oil to the pan. Using a paper towel, carefully spread the oil evenly across the entire cooking surface, including a little up the sides.
- Heat Until Smoking: Return the pan to medium heat. Watch closely as the oil heats up; it should begin to smoke lightly. This indicates the oil is polymerizing and forming a protective bond with the pan’s surface.
- Cool Down: Once the oil smokes, immediately remove the pan from the heat. Allow it to cool down completely to room temperature. This cooling process helps to set the newly formed oil layer.
- Wipe Away Excess: After cooling, use a clean paper towel to gently wipe away any excess oil. The pan should feel smooth and slightly slick, not greasy. Your pan is now ready for use!
Oven Seasoning Method (for oven-safe pans)
If your non-stick pan is oven-safe (always check the manufacturer’s instructions), this method can create a more robust seasoning.
- Warm the Pan: Place the clean, dry pan on the stovetop over medium heat for a few minutes to warm it up.
- Preheat Oven: While the pan warms, preheat your oven to 400°F (204°C). This temperature is often the smoke point for common vegetable oils, ensuring effective polymerization.
- Coat with Oil: Remove the warm pan from the stovetop. Pour about ½ inch of non-salted vegetable oil into the pan, ensuring the entire bottom is coated. Some experts also recommend olive oil for oven seasoning.
- Bake: Place the pan carefully in the preheated oven and bake for approximately 2 hours. It’s normal to see some light smoke during this process; once the smoke subsides, the seasoning is complete.
- Cool Overnight: Turn off the oven, but leave the pan inside with the oven door closed. Allow the pan to cool completely overnight. This slow cooling helps the oil layer fully set. Remove the pan the following morning.
Beyond Seasoning: Daily Care Tips for Lasting Non-Stick Pans
Seasoning is just one part of the equation for a long-lasting non-stick pan. Everyday maintenance is equally vital.
- Mind the Heat: Always cook with low to medium heat. High temperatures can cause the non-stick coating to break down over time, reducing its effectiveness and lifespan.
- Choose the Right Tools: Use only wooden or silicone utensils. Metal spatulas or spoons can scratch and damage the delicate non-stick surface, leading to flaking and sticking.
- Gentle Cleaning: After cooking, allow your pan to cool completely before washing. Hand wash with warm, soapy water and a soft sponge or cloth. Avoid putting non-stick pans in the dishwasher, as harsh detergents can be too abrasive and degrade the coating.
- Smart Storage: Prevent scratches by storing your non-stick pans carefully. Avoid stacking them directly on top of each other without a protective layer, such as a pan protector or a sheet of paper towel, in between.
When It’s Time to Say Goodbye: Recognizing a Pan Beyond Repair
Even with the best care, non-stick pans don’t last forever. Knowing when to replace them is crucial for both cooking performance and safety. You should consider replacing your non-stick pan if:
- The coating is flaking or peeling: This indicates significant damage, and small pieces of the coating can leach into your food.
- The surface is deeply scratched: Deep scratches compromise the non-stick effectiveness and can also lead to the coating deteriorating further.
- Food consistently sticks: If, despite proper cleaning and re-seasoning, food continues to stick, the pan’s non-stick properties are likely exhausted.
Conclusion
Mastering the art of seasoning and consistent care for your non-stick pan is a game-changer in the kitchen. By taking a few simple steps—from initial seasoning and gentle cleaning to using appropriate tools and heat—you can significantly enhance your pan’s non-stick performance and extend its lifespan. Embrace these practices, and you’ll enjoy perfectly cooked meals and effortless cleanup for much longer. What’s your favorite dish to cook in a perfectly seasoned non-stick pan?
Frequently Asked Questions
How often should I season my non-stick pan?
There’s no strict schedule, but a good rule of thumb is to season new pans before first use and re-season whenever you notice food starting to stick or the non-stick properties diminishing. Some brands suggest a refresh every one to six months with regular use.
Can I use olive oil to season my non-stick pan?
While some sources mention olive oil for oven seasoning, neutral oils like vegetable, canola, or coconut oil are generally recommended due to their higher smoke points and ability to create a more effective polymerized layer without leaving a strong scent.
What if my non-stick pan is already scratched or peeling?
If your non-stick pan has deep scratches or the coating is actively flaking or peeling, it’s generally best to replace it. Seasoning can help with minor imperfections, but severe damage compromises both performance and safety, as particles of the coating can detach into your food.
Is seasoning a non-stick pan the same as seasoning cast iron?
No, the process is similar but the goal differs. With cast iron, seasoning builds a thick, rust-preventing, non-stick layer through polymerization. For non-stick pans, seasoning helps maintain and reinforce the existing chemical non-stick coating by filling in microscopic pores and smoothing the surface, extending its inherent non-stick qualities.