Every home chef cherishes a reliable non-stick pan, the unsung hero of effortless cooking and easy cleanup. But what happens when that trusty surface starts to fail, turning your morning eggs into a sticky mess? Before you relegate your once-beloved pan to the recycling bin, consider whether a DIY restoration might bring it back to life. While true non-stick coatings cannot be chemically reapplied at home, several effective techniques can revive a pan that’s lost its slickness due to residue buildup or minor surface wear. This guide will walk you through understanding your non-stick pan, safe restoration methods, and essential care tips to prolong its life.

Understanding Non-Stick Pans: When Restoration is Possible (and When It’s Not)
Non-stick pans feature a specialized coating, most commonly PTFE (often known by the brand name Teflon) or ceramic, designed to prevent food from adhering to the cooking surface. Over time, this coating can degrade due to improper use, high heat, abrasive cleaning, or simply age. When the non-stick properties diminish, it’s often due to one of two reasons: either there’s a buildup of cooking residue and polymerized oils creating a sticky layer, or the actual non-stick coating has suffered irreversible physical damage like deep scratches, chipping, or flaking.
It’s crucial to understand that if your pan’s non-stick coating is peeling, bubbling, deeply scratched, or flaking off, true DIY restoration is not possible. The application of these coatings is a complex industrial process, and attempting to cook on a severely compromised pan can pose health risks as coating particles might mix with your food. In such cases, replacing the pan is the safest and most practical option. However, if your pan is merely sticky due to residue or has only minor, superficial wear, it can often be revived.
Common Issues Making Non-Stick Pans Sticky
Several factors contribute to a non-stick pan losing its efficiency, even before irreversible damage occurs. Recognizing these issues is the first step toward successful revival.
- Residue Buildup: Over time, cooking oils and food particles can accumulate on the pan’s surface, baking on and forming a sticky layer that mimics a failing non-stick coating. This is often the easiest problem to address with proper cleaning.
- Minor Surface Degradation: Even without deep scratches, the non-stick surface can become less effective due to microscopic wear from regular use, harsh cleaning, or exposure to excessive heat. This often manifests as food sticking in certain spots.
- Improper Seasoning (or lack thereof): While not truly “seasoning” in the cast iron sense, applying a thin layer of oil and gently heating it can help create a temporary slick barrier that improves the pan’s performance. Many non-stick pans benefit from a light “conditioning” before first use and periodically thereafter.
- High Heat Exposure: Non-stick coatings are generally not designed for very high temperatures. Repeated exposure to excessive heat can break down the chemical bonds in the coating, leading to degradation and a loss of non-stick properties.
DIY Methods to Revive a Sticky Non-Stick Pan
If your non-stick pan isn’t severely damaged, these methods can help restore its performance by addressing residue buildup and providing a temporary slick layer.
1. The Deep Clean: Baking Soda & Vinegar Method
This method is excellent for removing stubborn, sticky residue and polymerized oils that have accumulated on the pan’s surface.
- Step 1: Initial Cleanse: Begin by washing the pan with warm, soapy water and a soft, non-abrasive sponge to remove any loose food particles and grease. Rinse thoroughly.
- Step 2: Boil & Deglaze: If the pan still feels sticky, fill it with water (about halfway) and add a few tablespoons of baking soda. Bring the mixture to a boil on the stove and let it simmer for 5-10 minutes. The boiling water and baking soda help loosen stuck-on grime.
- Step 3: Paste for Tough Stains: For even more stubborn residue, drain the water (after it has cooled slightly) and create a paste using baking soda and a few tablespoons of white vinegar. Apply this paste to the sticky areas and let it sit for 15 to 30 minutes.
- Step 4: Gentle Scrub & Rinse: Using a soft sponge or cloth, gently scrub the pan. Avoid abrasive scrubbers like steel wool, which can damage the coating. Rinse the pan thoroughly with warm water until all residue is gone. Dry completely.
2. The Oil “Re-Seasoning” Technique
This method helps to fill in minor surface imperfections and create a temporary, slick layer that enhances the pan’s non-stick properties. It’s often effective for pans that have lost some slickness but aren’t deeply scratched.
- Step 1: Clean and Dry: Ensure your pan is completely clean and dry before starting.
- Step 2: Apply Oil: Pour 1-2 teaspoons of a high smoke point oil, such as vegetable, canola, or grapeseed oil, into the pan. Using a paper towel, rub the oil evenly across the entire non-stick surface, including the sides. You want a very thin, almost imperceptible layer.
- Step 3: Gentle Heat: Place the pan over low to medium heat on your stovetop. Heat the oil until it begins to smoke lightly. This usually takes 1-2 minutes. Alternatively, if your pan is oven-safe, you can place it in a 300°F (150°C) oven for about 20 minutes.
- Step 4: Cool and Wipe: Turn off the heat and allow the pan to cool completely. Once cool, wipe away any excess oil with a clean paper towel. The pan should now feel slicker and ready for use. You can repeat this process periodically or whenever you notice a decline in performance.
3. The Milk Method (A Less Common Approach)
Some home cooks suggest a unique method using milk to revive a worn non-stick surface. This relies on the casein protein in milk to form a thin film.
- Step 1: Clean Pan: Start with a clean, dry non-stick pan.
- Step 2: Add Milk: Pour about half a cup of fresh milk into the pan, just enough to coat the entire cooking surface.
- Step 3: Gentle Boil: Place the pan on medium heat and let the milk come to a gentle boil. Watch carefully, as milk can boil over quickly. As it heats, the casein protein in the milk interacts with the pan’s surface.
- Step 4: Cool and Wipe: Once it starts bubbling, turn off the heat and let the pan cool completely. After cooling, gently wipe the inside with a soft cloth or paper towel to remove any residue. Rinse with warm water and dry thoroughly.
- Step 5: Optional Oil Seal: To further preserve the effect, drizzle a few drops of cooking oil over the surface, spread evenly with a paper towel, and heat on low for 1-2 minutes. This is said to seal the protein layer and restore a smoother finish.
“While DIY methods can enhance the performance of a tired non-stick pan, it’s essential to recognize their limitations. These tricks are excellent for addressing residue buildup and minor wear, but they can’t magically repair a fundamentally damaged coating. Prioritizing safety means knowing when to say goodbye to an old pan.” – Jane Doe, Culinary Materials Expert
Deciding to Restore or Replace: Key Considerations
Before investing time in restoration, evaluate your pan’s condition and your needs.
| Condition of Pan | Recommendation | Rationale |
|---|---|---|
| Sticky due to residue buildup | Restore (Deep Clean & Oil Seasoning) | The non-stick coating is likely intact but masked by grime. Cleaning will reveal its original properties. |
| Minor loss of slickness/some sticking in spots | Restore (Oil Seasoning, Milk Method) | The coating is worn but not damaged. These methods can create a temporary slick surface. |
| Deep scratches, peeling, chipping | Replace | Irreversible damage. Coating particles can flake into food, posing health risks. Performance will not be fully restored. |
| Warped or burnt coating | Replace | Structural integrity is compromised. Even if non-stick could be restored, uneven heating or safety issues persist. |
| Old pan (several years of heavy use) | Consider replacing, even if minor issues | Non-stick coatings have a finite lifespan. Older pans are more likely to have invisible degradation or be nearing the end of their useful life. |
When deciding, always prioritize safety. If you’re concerned about ingesting flaking coating or if the pan is too old and worn, replacement is the best choice.
 A person applying oil to a non-stick pan with a paper towel as part of a DIY restoration process.
Mastering Maintenance: Tips to Keep Your Non-Stick Pan Pristine
Preventing the loss of non-stick properties is far easier than trying to restore them. Adopt these best practices to extend your pan’s lifespan:
- Use High Smoke Point Oils: Opt for oils like avocado, grapeseed, or canola. Avoid aerosol sprays, which can cause sticky buildup that degrades the non-stick surface over time.
- Practice Heat Control: Non-stick pans perform best on low to medium heat. Overheating can damage the coating. Always preheat the pan with a little oil or liquid to help regulate temperature.
- Choose the Right Utensils: Stick to wood, silicone, or plastic utensils to prevent scratching the delicate non-stick surface. Metal utensils are a major culprit for irreversible damage.
- Hand Wash Only: Dishwashers, with their harsh detergents and high-pressure water, can strip and damage non-stick coatings. Always hand wash with mild dish soap and a soft sponge.
- Allow to Cool Before Washing: Thermal shock from washing a hot pan in cold water can cause warping or damage to the non-stick surface. Let your pan cool completely before cleaning.
- Store with Care: Prevent scratches by placing a paper towel, cloth, or pan protector between non-stick pans when stacking them. Avoid nesting pans directly inside each other without protection.
- Avoid Abrasive Cleaners: Harsh chemicals or abrasive scrubbing pads can wear away the non-stick layer. Stick to gentle soap and soft sponges.
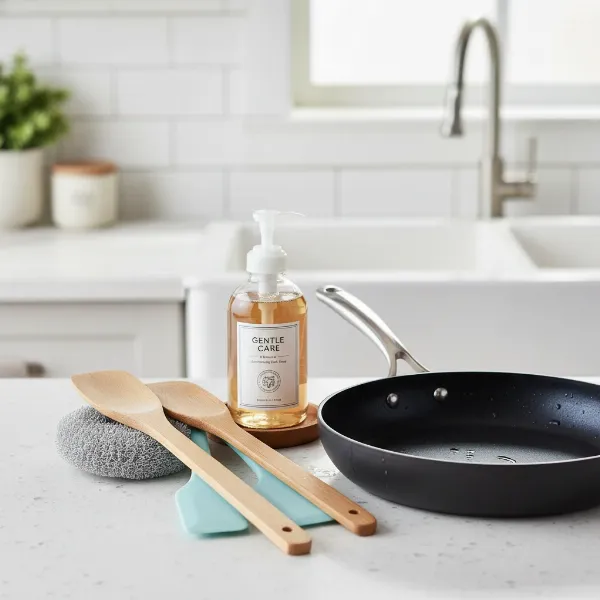 Various soft kitchen utensils (wood, silicone) and a soft sponge near a clean non-stick pan, emphasizing proper care.
Conclusion
While the idea of truly “restoring” a damaged non-stick coating at home is largely a myth, you absolutely can revive a pan that’s become sticky due to accumulated residue or minor wear. Through diligent deep cleaning, strategic oil “re-seasoning,” and even the occasional milk treatment, you can significantly improve your pan’s performance and extend its usable life. However, remember that certain damage, such as deep scratches or flaking, signals it’s time for a replacement to ensure both culinary quality and kitchen safety. By adopting conscientious usage and maintenance habits, you can keep your non-stick pans gliding smoothly for many meals to come. What simple trick has helped you keep your non-stick pans performing their best?
Frequently Asked Questions
Can I really fix a scratched non-stick pan?
True non-stick coatings with deep scratches or peeling cannot be chemically re-applied at home. However, minor surface wear or stickiness caused by residue buildup can often be improved with deep cleaning and oil conditioning methods. If the coating is significantly damaged, replacing the pan is recommended for safety.
Is it safe to use a non-stick pan if the coating is flaking?
No, it is generally not safe to use a non-stick pan if the coating is flaking, chipping, or deeply scratched. Particles from the degraded coating can mix with your food, posing potential health risks. It’s best to replace such a pan.
How often should I “re-season” my non-stick pan?
The frequency depends on usage. If you notice food starting to stick more often, or after a thorough deep clean, performing the oil “re-seasoning” technique can help restore some of its slickness. For general maintenance, doing it every few months or as needed can be beneficial.
What kind of oil should I use for “re-seasoning” non-stick pans?
For “re-seasoning” non-stick pans, use high smoke point oils such as vegetable oil, canola oil, or grapeseed oil. These oils can withstand the gentle heating process required to create a temporary, slick film on the pan’s surface without breaking down rapidly.