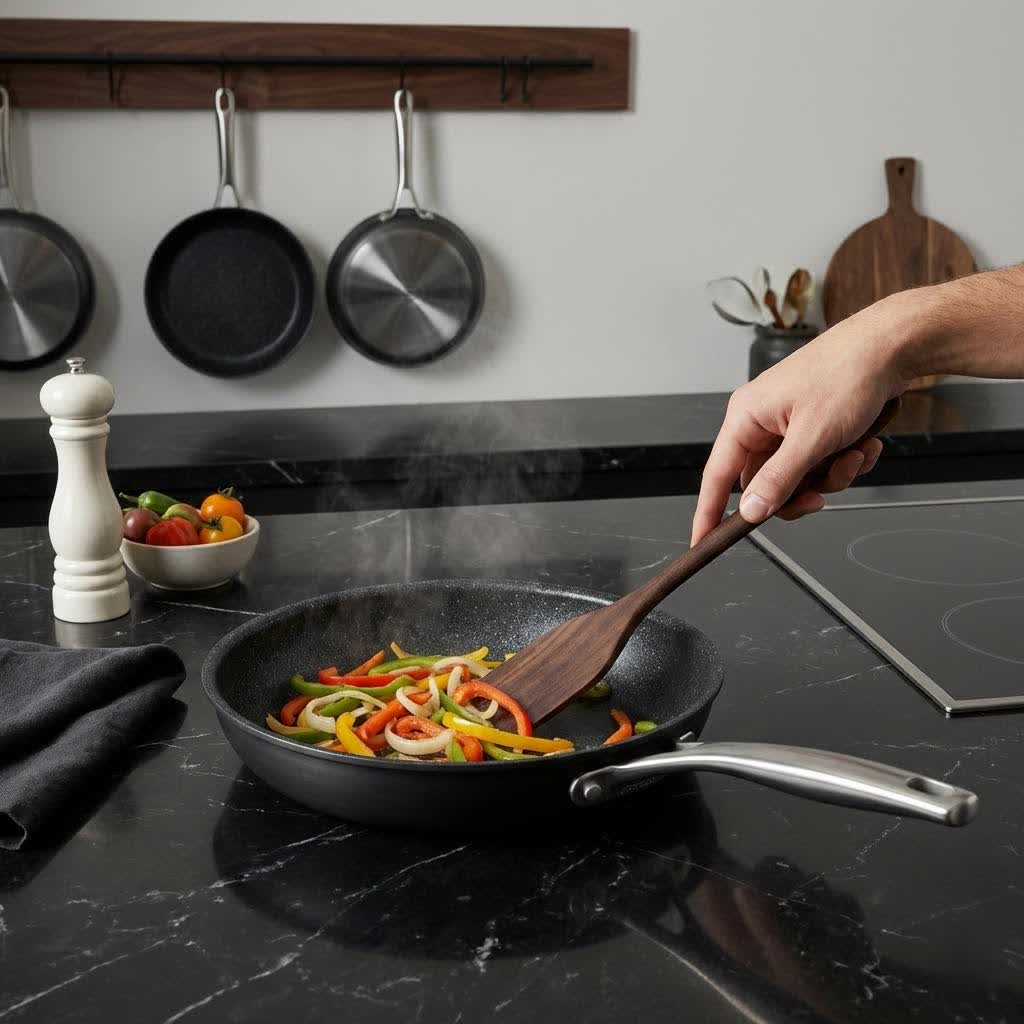
There’s nothing quite as frustrating as pulling out your trusty non-stick pan, ready to whip up a delicious meal, only to find a stubborn layer of burnt-on food clinging to its surface. The immediate urge might be to grab the harshest scrubber you can find, but for a non-stick pan, that’s a recipe for disaster. Its delicate coating, while incredibly convenient, is also surprisingly vulnerable to damage from abrasive cleaning methods. This guide will equip you with safe, effective strategies to remove even the most persistent burnt residue, restoring your pan’s performance without compromising its integrity.
Understanding the Non-Stick Pan’s Delicate Coating
Non-stick pans are kitchen staples, cherished for their ability to cook food with minimal oil and make cleanup a breeze. This magic is all thanks to their special coating, often made from materials like PTFE (Teflon), ceramic, granite, or titanium. These surfaces are designed to prevent food from adhering, but they are also quite fragile. Using abrasive sponges, metal utensils, or harsh chemical cleaners can easily scratch, peel, or degrade this coating, rendering your pan ineffective and potentially releasing harmful chemicals. The key to a long-lasting non-stick pan is gentle care, especially when faced with a burn.
Essential Preparations Before Cleaning a Burnt Non-Stick Pan
Before you begin any cleaning ritual, proper preparation is crucial to protect your pan and ensure success. Always prioritize safety and the longevity of your cookware.
The most important first step is to allow your pan to cool completely after cooking. Pouring cold water into a hot pan can cause thermal shock, potentially warping the pan’s base and compromising its structure. Once cool, gently scrape away any loose, easily removable food particles using a wooden spoon or a silicone spatula. Avoid anything metallic that could scratch the surface. Next, gather your non-abrasive cleaning arsenal: a soft sponge, a microfiber cloth, dish soap, baking soda, white vinegar, and possibly a lemon. These common household items are powerful yet gentle, perfect for tackling burnt-on messes safely.
Proven Methods to Remove Burnt Food Without Harm
When gentle dish soap and water aren’t enough, turn to these tried-and-true methods designed to lift burnt residue without compromising your non-stick surface.
Method 1: The Baking Soda and Vinegar Boil
This popular and highly effective method harnesses the power of a gentle chemical reaction to loosen burnt-on food.
- Step-by-step instructions: First, ensure your pan is completely cool. Pour one part white vinegar and three parts water into the burnt pan, enough to cover the affected area. Place the pan on your stovetop and bring the mixture to a gentle simmer for 5-10 minutes. This helps to loosen the burnt debris. Carefully remove the pan from the heat. While the mixture is still warm, sprinkle 1-2 tablespoons of baking soda directly into the liquid. You’ll observe a fizzing reaction, which further helps to lift the burnt particles. Let the pan sit until it has completely cooled.
- Why it works: The acidity of the vinegar combined with the alkaline baking soda creates a gentle effervescence that breaks down and lifts the burnt food. The simmering process also helps to hydrate and soften the hardened residue.
- Tips for stubborn spots: After the pan has cooled, use a wooden spoon or silicone spatula to gently scrape away the loosened bits. Then, drain the liquid and wash the pan with warm, soapy water and a soft sponge. For any lingering stains, proceed to Method 2.
|
Our Picks for the Best Non stick pan in 2026
As an Amazon Associate I earn from qualifying purchases.
|
||
| Num | Product | Action |
|---|---|---|
| 1 | Tramontina Professional 8-Inch Non Stick Small Frying Pan, Heavy-Gauge Aluminum Skillet with Reinforced Nonstick Coating, Red Handle, Dishwasher and Oven Safe |

|
| 2 | SENSARTE Nonstick Frying Pan Skillet with Lid, 12 Inch Large Deep Frying Pan, 5 Qt Non Stick Saute Pan with Cover, Induction Pan, Healthy Non Toxic Cooking Pan with Helper Handle, PFOA PFOS Free |
|
| 3 | Tramontina Professional 10-Inch Non Stick Frying Pan, Heavy-Gauge Aluminum Skillet with Reinforced Nonstick Coating, Red Handle, Dishwasher and Oven Safe |
|
| 4 | SENSARTE Nonstick Skillet, Deep Frying Pan 10/11/12-inch, Saute Pan with Lid, Stay-cool Handle, Healthy Stone Cookware Cooking Pan, Induction Compatible (10-Inch/3.5QT) |
|
| 5 | Non Stick Frying Pans, 12-inch with Lid, Hybrid Fajita Pans Nonstick,non stick Skillets Stainless Steel, Dishwasher & Oven-Safe, Induction Compatible Cooking Pan, PFOA Free Cookware |
|
| 6 | CAROTE Nonstick Frying Pan Skillet,Non Stick Granite Fry Pan Egg Pan Omelet Pans, Stone Cookware Chef's Pan, PFOA Free,Induction Compatible(Classic Granite, 8-Inch) |
|
| 7 | SENSARTE Nonstick Frying Pan Skillet, Swiss Granite Coating Omelette Pan, Healthy Stone Cookware Chef's Pan, PFOA Free (8/9.5/10/11/12.5 Inch) (8 Inch) |
|
| 8 | GoodCook Nonstick Sauté Pan, 10 Inch, Black |
|
| 9 | SENSARTE Nonstick Frying Pan Skillet, Swiss Granite Coating Omelette Pan, Healthy Stone Cookware Chef's Pan, PFOA Free (9.5 Inch) |
|
| 10 | Blue Diamond 10" Nonstick Frying Pan Skillet, Diamond Infused PFAS & PTFE-Free Ceramic Pot, Dishwasher & Oven Safe, Stay Cool Handle, Durable Non Toxic Metal Utensil Safe, Egg & Omelet Pan, Blue |
|
Method 2: Baking Soda Paste for Targeted Treatment
For localized or particularly stubborn burnt spots, a baking soda paste can provide a more concentrated cleaning action.
- Step-by-step instructions: In a small bowl, mix a few drops of water with baking soda to form a thick, spreadable paste. Apply this paste directly onto the burnt areas of your cool pan. Let the paste sit and work its magic for 15-30 minutes, or even longer for very tough stains. The baking soda will gently draw out and break down the burnt residue. After the waiting period, use a soft, non-abrasive sponge or cloth to gently wipe and scrub the affected spots. Rinse the pan thoroughly with warm water and dry it completely.
- When to use this method: This technique is ideal for smaller, concentrated burnt patches that the boiling method might not fully address, offering a targeted approach without requiring a full pan boil.
Method 3: Lemon and Water for Lighter Burns
Lemon is a natural cleaning agent, and its mild acidity can be effective for lighter burnt marks or general discoloration.
- Step-by-step instructions: Cut one or two lemons into quarters. Place the lemon pieces in the burnt pan and add enough water to cover the stained areas. Bring the water to a boil and let it simmer for about 5-10 minutes. The lemon’s natural acids will work to gently lift the burnt residue. Once done, remove from heat, let it cool, then discard the lemons and wash the pan as usual with dish soap and a soft sponge.
- Natural acidity for gentle cleaning: The citric acid in lemons acts as a mild solvent, helping to dissolve and loosen mineral deposits and light burnt food without harsh scrubbing.
Method 4: Simple Soaking for Fresh Burnt Spots
Sometimes, the simplest solution is the best, especially for freshly burnt food that hasn’t fully hardened.
- Step-by-step instructions: After the pan has cooled, fill it with warm, soapy water and let it soak for at least 15-30 minutes. The warm water and soap will help to rehydrate and soften the burnt food, making it easier to remove. After soaking, use a soft sponge or a soft-bristled brush to gently scrub away the loosened residue. Rinse thoroughly with warm water and dry.
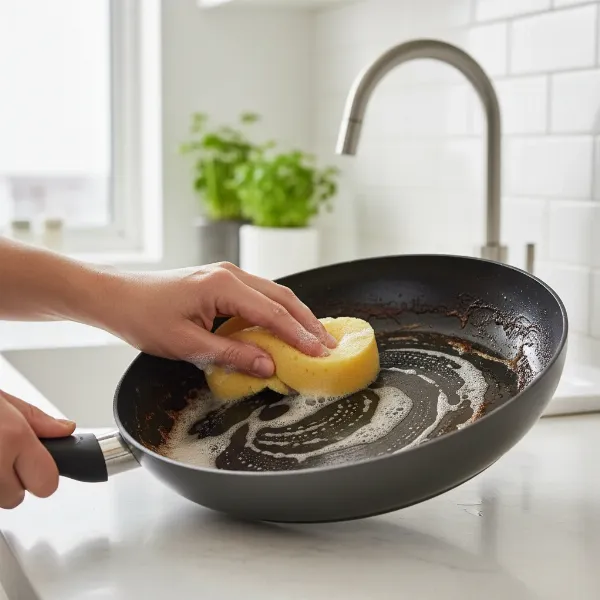 A person gently scrubbing a non-stick pan with a soft sponge after soaking, illustrating safe cleaning methods for burnt residue.
What NOT to Use When Cleaning a Burnt Non-Stick Pan
Knowing what to avoid is just as crucial as knowing what to use when cleaning a burnt non-stick pan. Using the wrong tools or chemicals can instantly ruin your pan’s coating, making it stick and shortening its lifespan.
- Abrasive scourers: Absolutely avoid steel wool, highly abrasive scrub pads, or anything that feels rough to the touch. These materials will scratch and tear through the non-stick layer, leaving it permanently damaged and prone to sticking.
- Metal utensils: While you might be tempted to scrape with a metal spatula, resist the urge. Metal will scratch the delicate surface, creating areas where food can stick and potentially exposing the underlying material. Always opt for wooden or silicone utensils.
- Harsh chemical cleaners: Steer clear of oven cleaners, bleach, or any strong, caustic chemicals. These products are designed for heavy-duty cleaning on more robust surfaces and can strip or corrode the non-stick coating.
- Dishwashers: Although some non-stick pans are labeled “dishwasher safe,” frequent machine washing can accelerate the degradation of the coating. The high heat, harsh detergents, and vigorous water jets can all contribute to wear and tear. Handwashing is always the gentler, preferred method for longevity.
- Cold water on a hot pan: As mentioned, this can cause thermal shock, leading to warping or cracking of your pan, which affects its ability to heat evenly.
Maintaining Your Non-Stick Pan to Prevent Future Burns
Prevention is always better than cure. Adopting good cooking and cleaning habits will significantly extend the life of your non-stick pan and minimize future burnt-on disasters.
- Use low to medium heat: Non-stick pans perform best at lower temperatures. High heat can cause the non-stick coating to degrade over time and also makes food more prone to burning. For searing or high-heat cooking, consider using other types of cookware like cast iron or stainless steel.
- Avoid overheating empty pans: Never leave a non-stick pan on a hot burner without food or liquid in it. This can quickly overheat the coating, leading to damage and potential release of fumes.
- Use appropriate oils/fats: While non-stick pans require less oil, using a small amount helps distribute heat and prevents food from sticking. Avoid cooking sprays that contain aerosols, as these can leave a residue that builds up and harms the non-stick surface.
- Proper storage: To prevent scratches when storing, place a paper towel or a pan protector between stacked non-stick pans.
- Gentle daily cleaning habits: After each use, allow the pan to cool, then wash it by hand with warm, soapy water and a soft sponge. Dry it immediately to prevent water spots and rust.
What’s The Most Common Reason For A Burnt Non-Stick Pan?
> “Overheating an empty non-stick pan or using excessively high heat during cooking are the primary culprits behind burnt residue. The non-stick coating is designed for moderate temperatures, and pushing it too far can cause food to rapidly char and adhere to the surface, despite its non-stick properties.” – Chef Elena Rodriguez, Culinary Expert
Conclusion
A burnt non-stick pan doesn’t have to mean the end of your cookware. By understanding the delicate nature of its coating and employing the right gentle cleaning techniques, you can effectively remove burnt food and restore your pan to its former glory. Remember the power of baking soda and vinegar, the targeted approach of a baking soda paste, or the natural acidity of lemons for lighter burns. Crucially, always avoid abrasive tools and harsh chemicals, and make gentle care a cornerstone of your non-stick pan maintenance. With these tips, your favorite non-stick pan will continue to serve up easy, delicious meals for years to come.
What’s your secret weapon against burnt food, or your go-to dish for your perfectly clean non-stick pan?
Frequently Asked Questions
Can I use steel wool on a burnt non-stick pan?
No, absolutely not. Steel wool is highly abrasive and will severely scratch and damage the non-stick coating, rendering your pan ineffective and potentially unsafe for future use. Always opt for soft sponges or cloths.
Is baking soda safe for all non-stick pans?
Yes, baking soda is generally safe for non-stick pans when used correctly. Its mild abrasive nature, especially when mixed into a paste or used in a boil with vinegar, can effectively lift burnt food without harming the delicate coating.
What if the burnt food won’t come off after trying these methods?
For extremely stubborn burnt areas, you can repeat the baking soda and vinegar boil or the baking soda paste method. Sometimes, multiple applications and extended soaking times are needed. However, if the coating itself appears compromised, it might be time to consider replacing the pan.
When should I consider replacing a burnt non-stick pan?
You should consider replacing your non-stick pan if the coating is visibly scratched, flaking, peeling, or if food consistently sticks even after thorough cleaning. A damaged coating indicates a loss of non-stick properties and potential health concerns.